Features
- Supports multiple methods such as ssr and vpn
- Same as before, a fully automatic script that does not require manual configuration. You only need to know your domain name and think of a password.
- This time, the php dependency installation has been removed entirely. Everything is downloaded and included in the installation package, so there is no longer any need to worry about failures caused by php dependencies being blocked.
- bbr
wget --no-check-certificate https://github.com/teddysun/across/raw/master/bbr.sh
chmod +x bbr.sh
./bbr.sh- Modify the ssh port
vi /etc/ssh/sshd_config
service sshd restart #Restart for changes to take effect- Manage ssr
supervisorctl {start|stop|restart} ssrRequirements
centos 7 or 6 will both work~
Screenshots
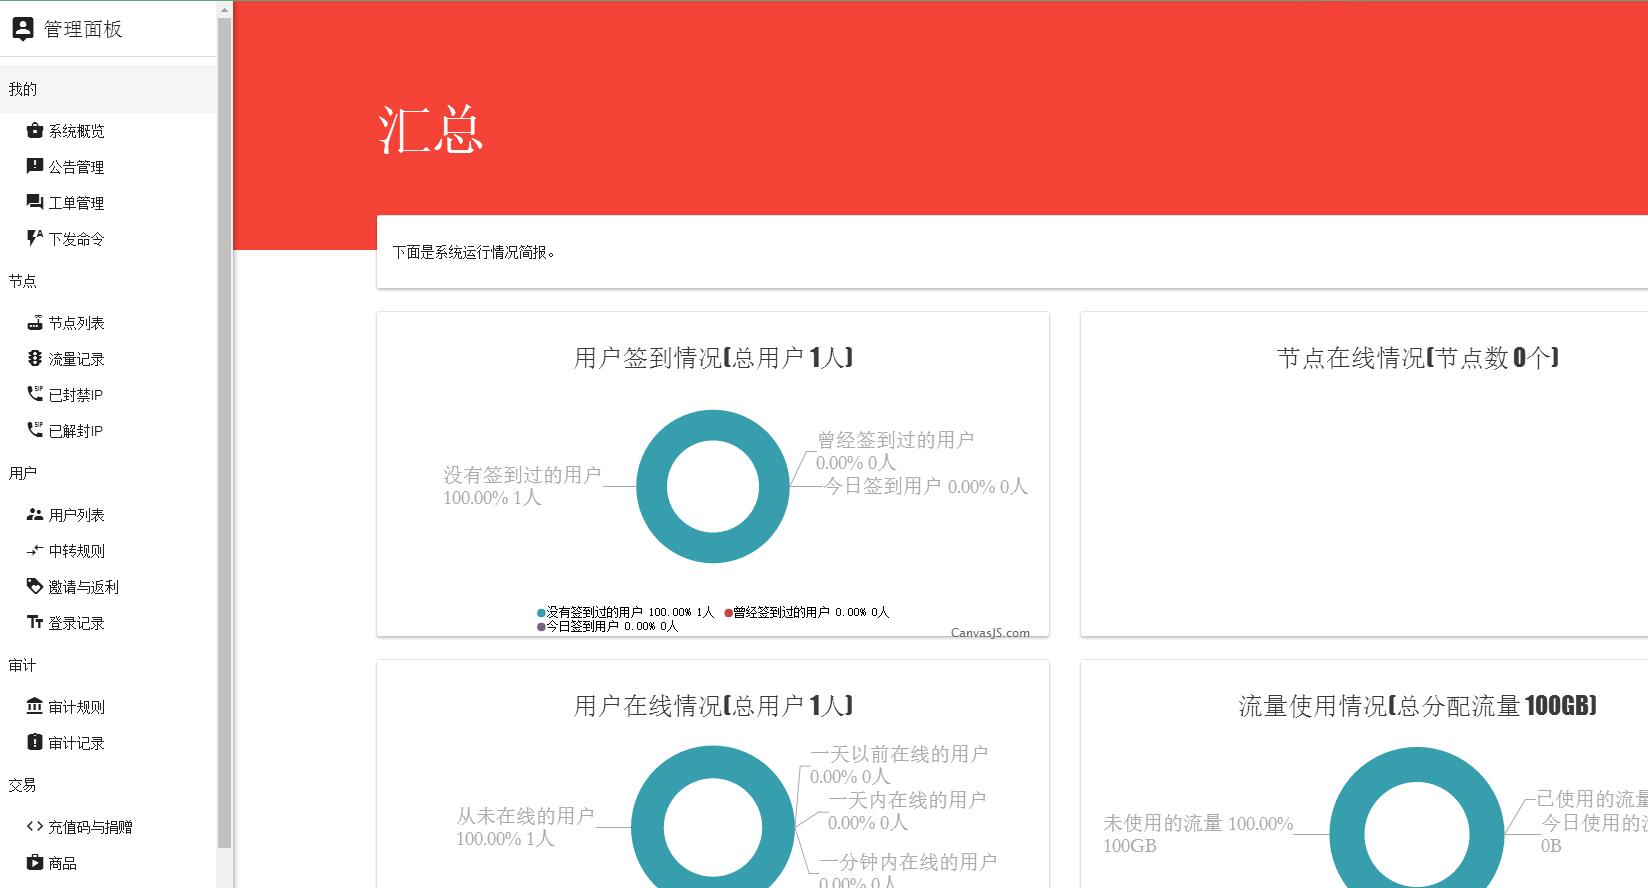
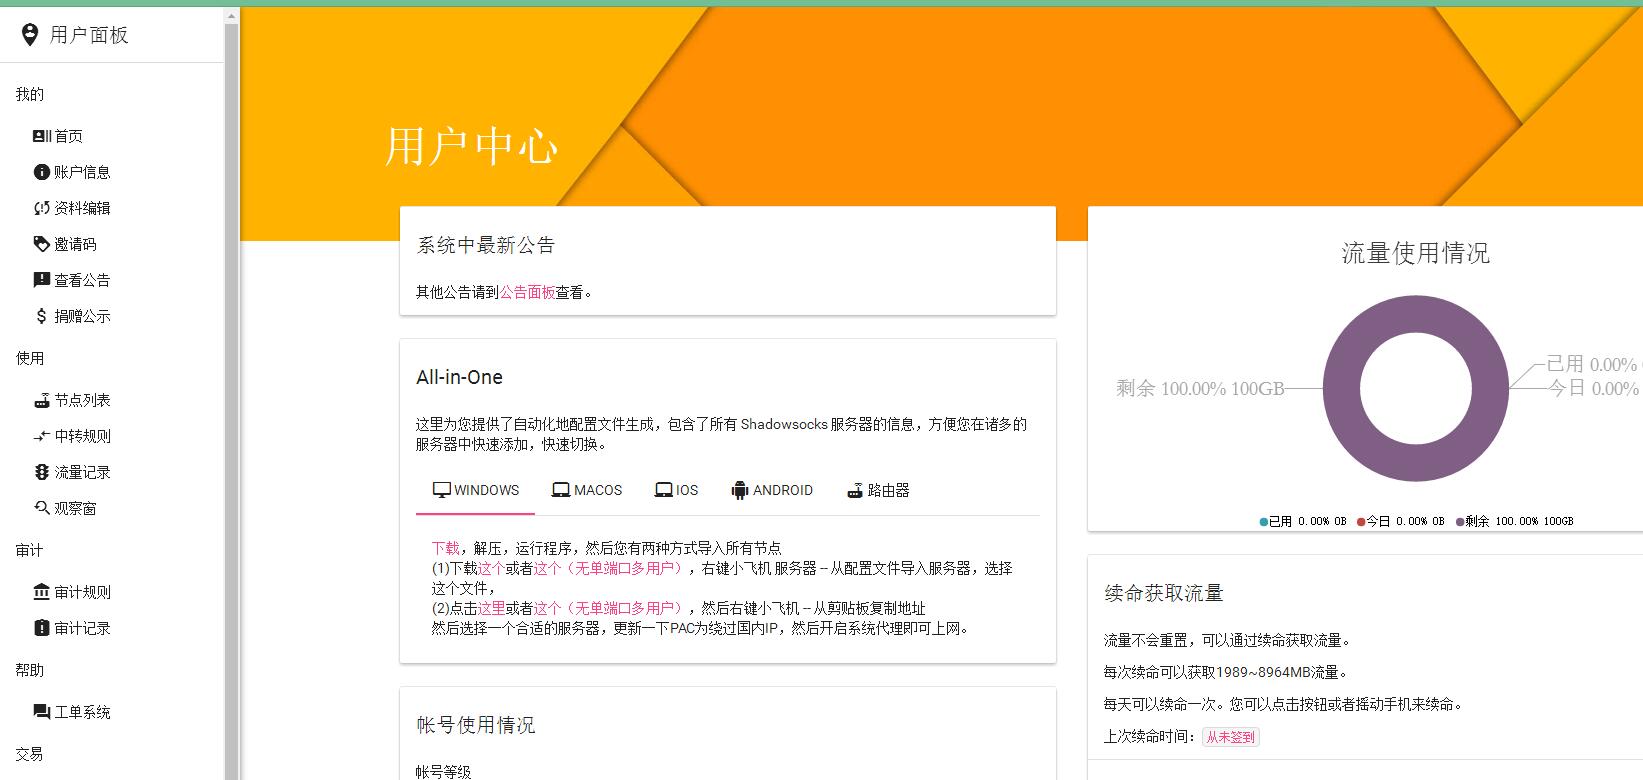
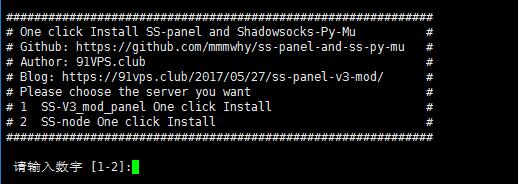
One-click script
wget -N --no-check-certificate https://raw.githubusercontent.com/mmmwhy/ss-panel-and-ss-py-mu/master/ss-panel-v3-mod.sh && chmod +x ss-panel-v3-mod.sh && bash ss-panel-v3-mod.sh
Step 1: Set up an SS-panel v3 mod site
Enter 1 and press Enter
Aside from lnmp’s own compilation time (when lnmp is compiling, you need to press Enter once more to confirm)

The installation of the modified ss-panel version can be completed with one click in 3 minutes. For those who know how, installing the modified ss-panel version is not difficult at all; for those who do not, it is incredibly difficult.
Default account: [email protected]
Default password: feiyang
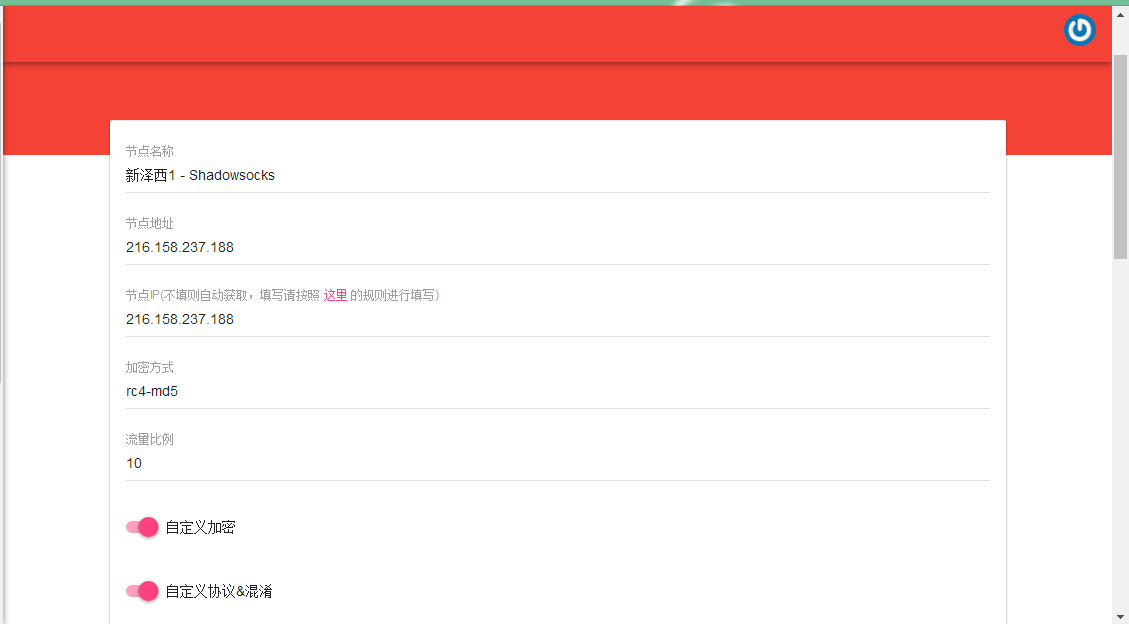
Step 2: Create node information in the website
Note: after entering the frontend, the first thing you should do is create a new node
Admin Panel–>Node List–>Plus sign in the lower right corner–>Enter information
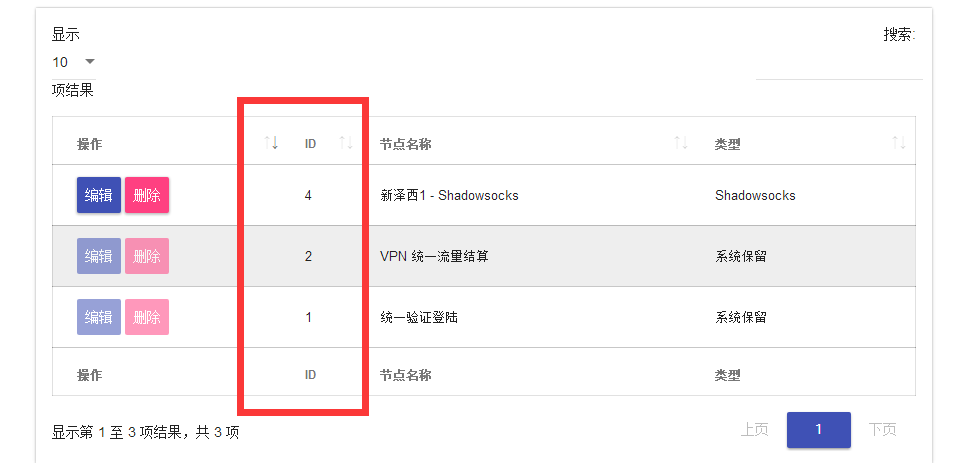
Step 3: Set up the ss multi-user version (first create node information on the website and remember the node_id)
The node_id looks like this
wget -N --no-check-certificate https://raw.githubusercontent.com/mmmwhy/ss-panel-and-ss-py-mu/master/ss-panel-v3-mod.sh && chmod +x ss-panel-v3-mod.sh && bash ss-panel-v3-mod.sh
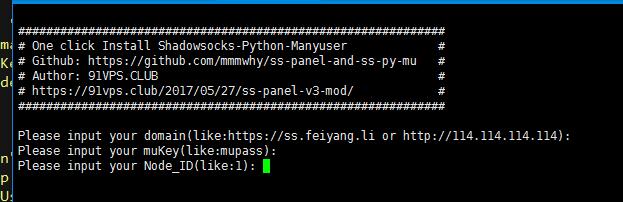
Enter 2, then you will need to enter the frontend site’s domain, token, and node_id.
- doamin: If the frontend site is set up on this VPS, you can just press Enter for the first domain, and it will automatically get the current IP address. (Make sure whether your domain uses https or http; otherwise, it may fail to push usage records.)
- mukey(token): If the frontend site was also set up using this script, you can also just press Enter for the second token. The default value is the frontend token, and it can connect automatically.
- node_id: Remember the ID in the image above? That’s the one. By default, the first ID is 3. Mine is 4 because I deleted the first node…
Other
- When creating new ss-panel modified nodes in the future, follow the order of step two and then step three. Do not create a node before any nodes exist, otherwise an error may occur because the ID information cannot be read.
- Note: When run through the script, the default log will be saved in the root directory as ssserver.log, which you can check manually. If there is a problem, please ask with the log contents.
- Relatively speaking, using WEBAPI_TOKEN on the backend
is much simpler. You only need NODE_ID, WEBAPI_URL, and the mukey from the frontend configuration entered into
WEBAPI_TOKEN.